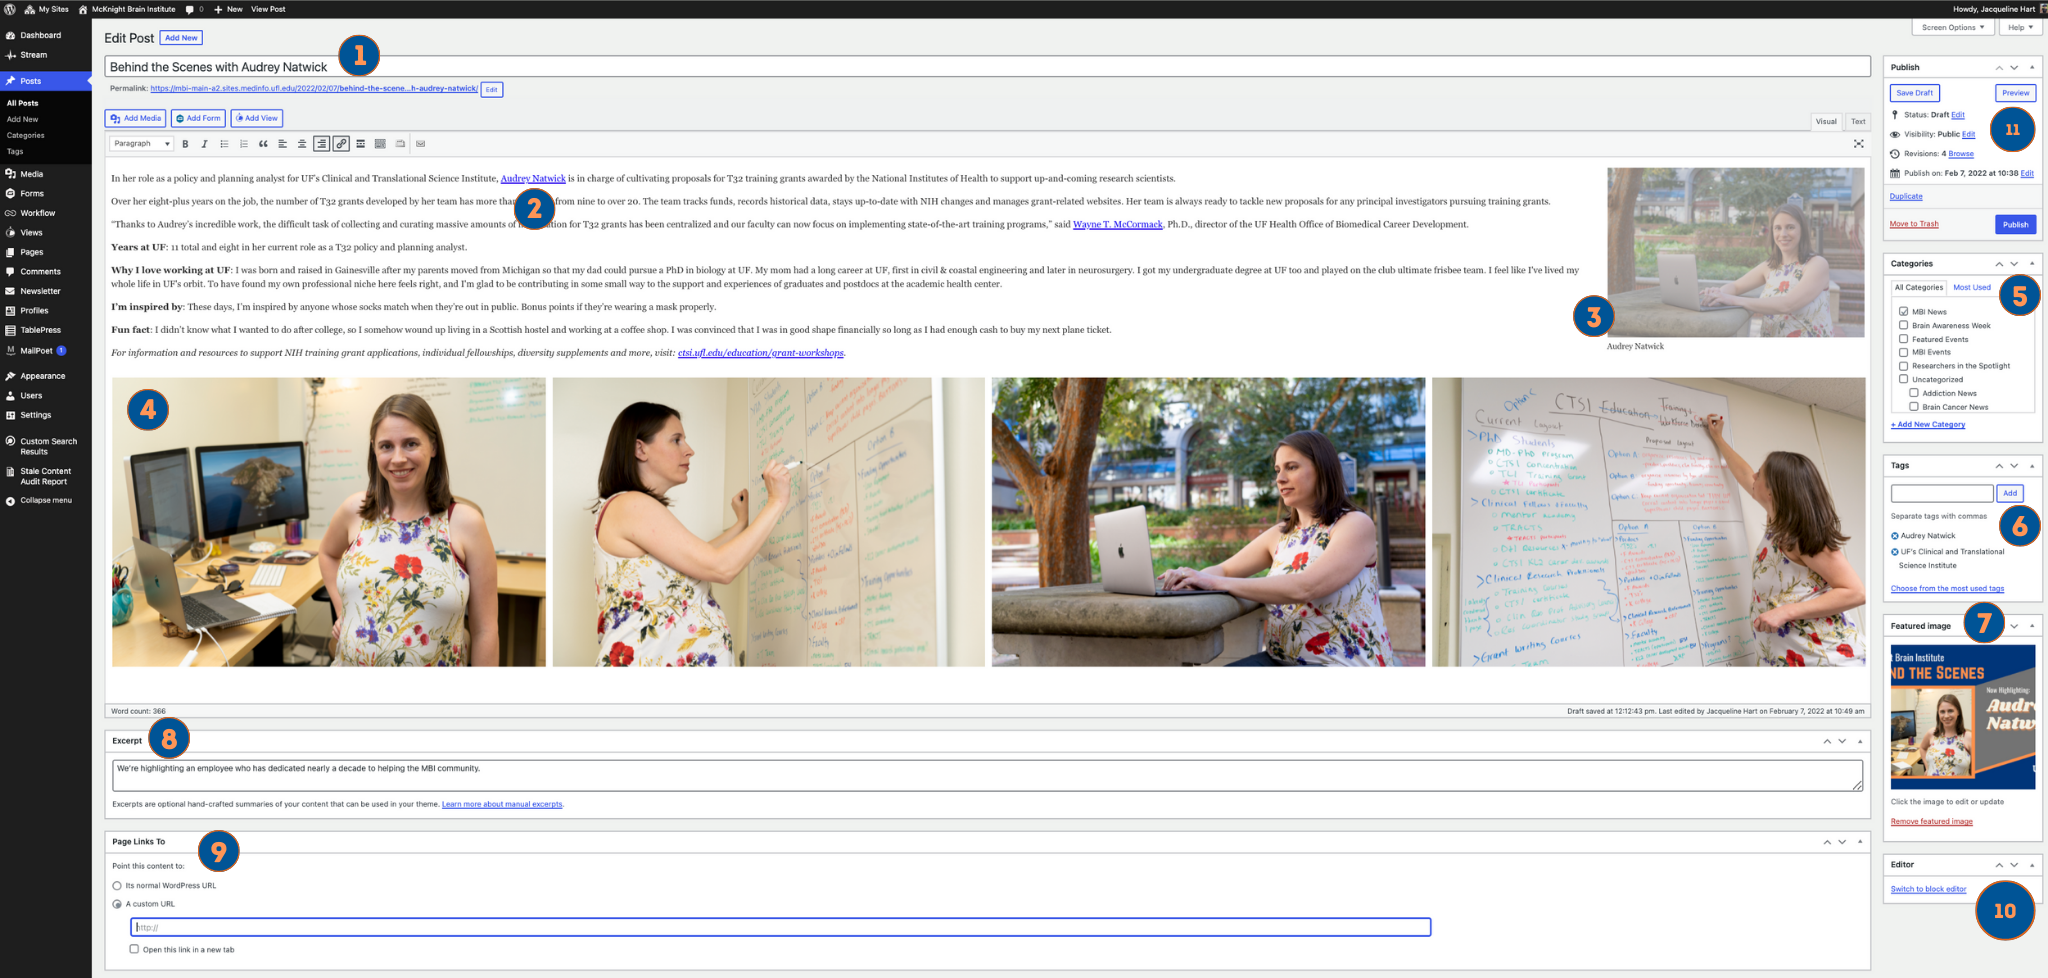
- Headline/Title: This will appear as the headline on your webpost and landing page card.
- Linking to UF Health Directory: We recommend linking to faculty and staff’s profile in the UF Health Directory. To insert a link, highlight the word(s) you’d like linked, then paste the link onto the word. If this method doesn’t work for you, you can also click the link icon.
- Image in post: This is a nice-to-have photo for your post. This will NOT appear on the card or social media. Be sure to add alt text for all photos!
- Photo Gallery: This is an option for including multiple stories in a web post. To add a gallery, click “add media.” When the media panel appears, look on the left-hand side and click “create a gallery” under actions. Be sure to add alt text for all photos!
- Categories: Selecting categories ensures that you post shows up in the correct place. Every website is set-up differently, so check your categories to ensure you’re organizing your posts correctly.
- Tags: Tags help make your post searchable on the website and the internet at large. We recommend tagging all proper nouns in your webpost.
- Featured Image: This image is very important and will appear on your card and affiliated social media posts. However, you will not see this image in the actual post. It is not the same as embedding a photo in the post (refer to step 3).
- Excerpt: This acts as a summary for your post on cards and news feeds. You will not see this text in the web post. If your post is missing this key bit of information, it will use the content directly from the body of your post. We don’t recommend leaving this field empty.
- Link Redirect: This is an option if you’d prefer for people to be taken directly to a different website. For example, you may post about a faculty member being mentioned in an article, but instead of writing content, you could simply link directly to the full article.
- Option to switch to block editor: This changes the editor from classic to block. Use this option if you’d like to use block elements.
- Publishing options:
Save Draft – save post as a draft.
Preview – preview any changes you’ve made to the post on the site as if it were “live.”
Status – indicates what the status of the post is. You can edit this field to change the status. For example, you can change a “Published” post to a “Draft”.
Visibility – change this setting to constrain whom is able to view the post. By default, it is set to Public.
Revisions – allows you to see who has revised the post, compare any changes, and revert to previous saved versions.
Published – either allow the post the default publishing time (immediately), or schedule a date/time to publish the post.
Move to Trash – move the post to the Trash where it will eventually be deleted.
Publish/Update – this button is the “save” button for your post.


